
This is the short version of getting Philter Desktop running, aimed at someone who has a document to redact this afternoon rather than a deployment to plan. We created Philter Desktop for users who have a relatively small number of documents to redact and want to do it straight from their Windows desktop.
If you would rather read about what the application does before installing anything, the introduction post covers that ground. If PDFs are most of what you handle, the hidden difficulties of redacting PDF documents is worth reading first.
1. Check the machine and install
Philter Desktop needs Windows 10 version 1809 or later, or Windows 11, on 64-bit hardware. There are native builds for both Intel and AMD processors and for ARM. Pick the build that matches your processor from the download page.
After downloading the installer from the download page, run it to install Philter Desktop on your computer.
2. Set up a policy for the kind of document you have
A policy is the part that decides what counts as sensitive in your documents and what happens to it. Philter Desktop ships with ready-made policies, and a guided wizard will build one for common document types by asking a few questions about what you are redacting.
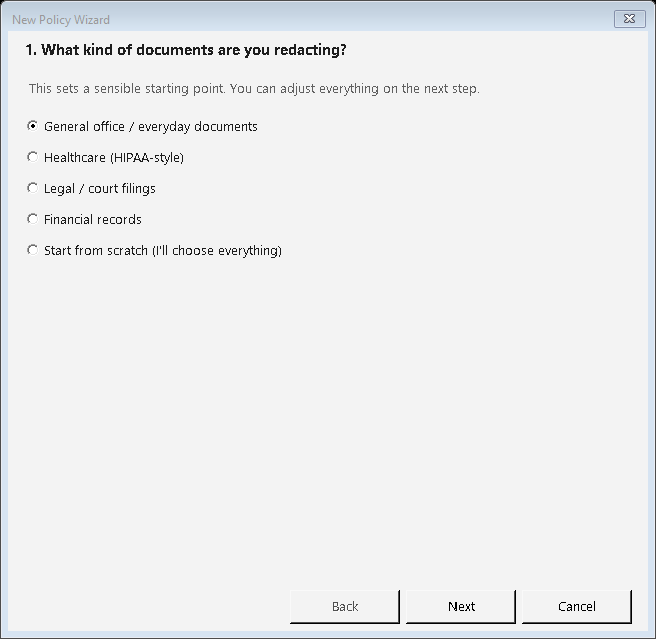
Start with the wizard output rather than trying to get the policy perfect first. A bundled on-device model finds person names in context, and configurable detectors handle Social Security numbers, employer identification numbers, account numbers, email addresses, phone numbers, and dates. If your documents contain identifiers specific to your organization, such as a matter number or a medical record number format, you can add those as your own terms and patterns once you have seen how the defaults do.
3. Drag your documents in
The main window takes files by drag and drop, and it works through them in the background while showing you the status of each one. It handles PDF, Word documents, Excel spreadsheets, CSV files, plain text, rich text, and email files in both .eml and .msg form, which covers most of what actually turns up in a folder of records.
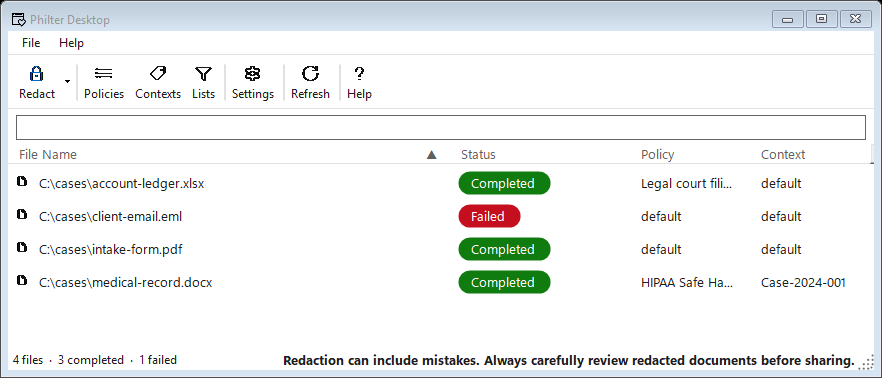
Your originals are not modified at any point. Every redaction is written as a new copy, so a bad policy costs you a re-run rather than a file.
4. Review the draft before it goes anywhere
Redacted files come out with a _redacted-draft suffix, which is deliberate. The name is there to stop a file going out on the assumption that the tool caught everything, because detection is probabilistic and the last check has to be a person.
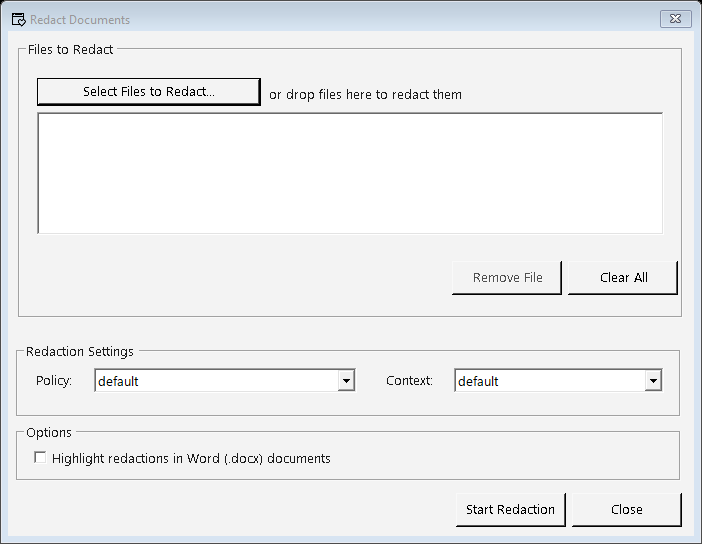
Open the draft and look at it, using the before and after view to move quickly. You can adjust what gets redacted and run it again, have the application re-scan the finished file to help catch anything the first pass missed, and produce a report or a JSON explanation of every change if you need a record of what was done.
5. Once it is working, stop doing it by hand
When the same kind of document comes through regularly, you can point Philter Desktop at a folder and have new files redacted as they arrive while it sits in the system tray. There is also a command line for batch jobs and a Windows Explorer right-click action for one-off files, which is usually the faster route for a single document you have already got open in a folder.
Two things are worth doing before you trust the output on real work. Run a representative sample of your own documents through it and check the results yourself, because how well any detector performs depends on what your files look like rather than on a benchmark. Then read the user guide for the settings this guide skipped, and if something is wrong or missing, the code and the issue tracker are both on GitHub.